One-Click Payment
This guide allows you to achieve a significant speedup of the checkout-process by re-using the data a customer entered for a previous transaction. It's based on one of these two guides:
How it works
1. Authenticate the customer
You will need a method to authenticate the customer against your records in order to obtain their respective registration.id (token) associated with their account. This can be achieved by asking the customer to log in for example, however you may find other ways that are applicable to your system.
The information that you might want to store, per customer, in order to execute a One-Click payment includes:
- registration.id (token)
- account brand
- last four digits of account number
- expiry date (if applicable)
2. Show the checkout
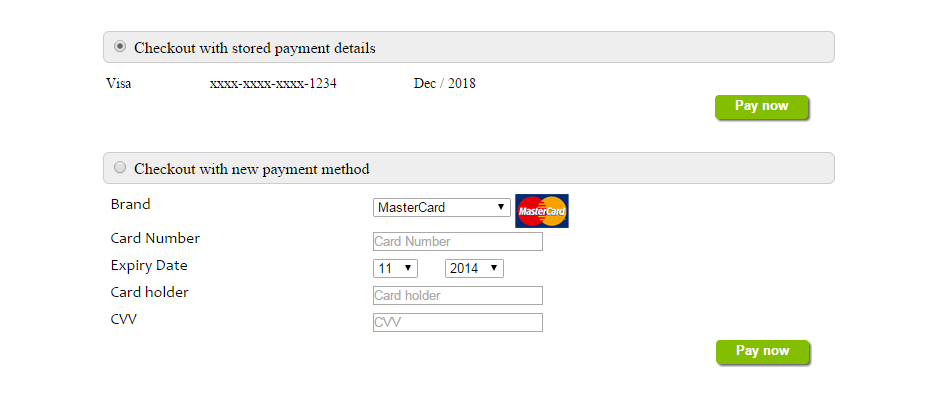
Once you have retrieved the stored information, you should confirm with the customer how they wants to checkout. We recommend offering normal payment methods alongside your One-Click checkout page.

<!DOCTYPE HTML>
<html>
  <head>
    <script>
    var wpwlOptions = {
        style: "card"
    }
    </script>
    <script src="https://sandbox-card.peachpayments.com/v1/paymentWidgets.js?checkoutId={checkoutId}"></script>
    <style>
        body { background-color:white; width:720px; margin:auto;padding:10px;font-size:14px;}
        h2 { margin-top:25px;margin-bottom:10px;padding:5px;width:100%;background-color:#eee;
        border:1px solid #ccc;border-radius:6px;font-size: 16px;font-weight:normal; }
    </style>
  </head>
  <body>
  <h2><input type="radio" checked="checked" /> Checkout with stored payment details</h2>
	<table>
		<tr><td width="100px">Visa</td><td width="200px">xxxx-xxxx-xxxx-1234</td><td width="200px">Dec / 2018</td></tr>
	</table>
	<div><button type="submit" name="pay" class="myButton">Pay now</button></div><br /><br />
  <h2><input type="radio" /> Checkout with new payment method</h2>
    <form action="http://localhost/pay.html">
      MASTER VISA AMEX CHINAUNIONPAY
    </form>
  </body>
</html>
3. Send the payment
When the customer checks out with One-Click, all you need to do is send a server-to-server request for a new payment with the respective registration.id (token) for which you want to make the payment. You can do this by sending a POST request to the /v1/registrations/{registration.id}/payments endpoint.
Try it out
